Half Square Triangle (HST): Methods, Tips & When to Use Each
- Kanitta

- Apr 25
- 3 min read
Updated: Apr 27
If you’ve been quilting for a while, you already know—Half Square Triangles (HSTs) are everywhere. From classic pinwheels to modern layouts, they’re one of the most versatile building blocks in quilting.
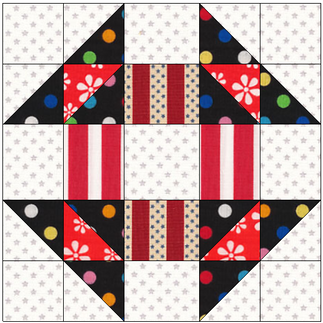
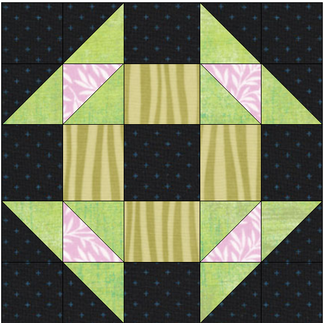
For example, this 10½″ block requires 12 HSTs.

But here’s the fun part…There isn’t just one way to make them. Let’s break it down 👇
How Many Ways to Make HSTs?
There are 5 main methods (plus a few variations), and each one shines in different situations:
Classic 2-at-a-time
4-at-a-time
8-at-a-time
Triangle (cut & sew) method
Strip / Tube method
🧵 1. Classic Method (2 at a Time)

Best for:
Accuracy
Beginners
Small batches
Steps:
Place two squares right sides together
Draw a diagonal line
Sew ¼” on both sides
Cut on the line
Press and trim to the size
The simple rule: take your finished HST size and add 1″—that’s your starting square.
(If you want less trimming, you can add 7/8″ instead. ) For example, for a 2″ finished HST, cut your squares at 3″.
Pros:
✔ Very accurate
✔ Easy to control
Cons:
✘ Slower for large quantities
🧵 2. 4-at-a-Time Method

Best for:
Speed
Medium batches
Steps:
Sew two squares together around all edges
Cut diagonally both ways
Open and press
Pros:
✔ Fast
✔ Less marking
Cons:
✘ Bias edges on all sides (can stretch!)
✘ The math can be tricky.
Here's the formula : (Finished size + 1/2" ) ÷ 0.64 For example, for a 2″ finished HST, cut your squares at 4″.
🧵3. 8-at-a-Time Method

Best for:
Production sewing
Reels/tutorial batching
Steps:
Draw grid (2 diagonals + 2 center lines)
Sew ¼” from diagonals
Cut vertically, horizontally, and diagonally
Pros:
✔ Very efficient
✔ Perfect for repetitive designs
Cons:
✘ Less flexible (must use same fabrics in batch)

🧵 4. Triangle Method (Cut First, Then Sew)

Best for:
Precision quilters
Fabric control (fussy cutting!)
Steps:
Cut squares diagonally into triangles
Pair contrasting triangles
Sew along long edge
Pros:
✔ No waste
✔ Great for directional prints
Cons:
✘ Bias edges (handle gently!)
✘ Slower
The simple rule: take your finished HST size and add 1″—that’s your starting square.
(If you want less trimming, you can add 7/8″ instead. )
🧵 5. Strip / Tube Method
This is my go-to method when I need to make a lot of HSTs. It’s quick—just sew the strips together and trim once
Best for:
Jelly roll projects
High volume
Steps:
Sew two strips together
Join ends to form a tube
Cut at 45° angles
Open into HSTs
To avoid bias edges, cut your strips on the straight grain rather than on the bias.
Pros:
✔ Super fast
Cons:
✘ Can be tricky at first
✘ Accuracy depends on cutting

💡 Which Method Should You Use?
Here’s a quick guide:
Beginner / accuracy first → 2-at-a-time
Quick + decent accuracy → 4-at-a-time
Batch sewing → 8-at-a-time
Fussy cutting / control → Triangle method
High volume → Tube method
🧷 Pro Tips (From Real Quilting Experience)
You’ll probably agree with these 👇
✨ Starch before cutting (especially for bias methods)
✨ Press, don’t drag your iron
✨ Check your HST and trim is needed—this is where precision really happens
Use the pattern available here to practice making HST units.


TUTORIAL


Comments